Procedure
Step 1: Fold the poster board lengthwise in half. Unfold it, and make sure there is a visible crease line.
Step 2: Cut the poster board in half, along the crease from the fold.
Step 3: Line up the shorter sides of the two poster board pieces together, and tape them.
Step 2: Cut the poster board in half, along the crease from the fold.
Step 3: Line up the shorter sides of the two poster board pieces together, and tape them.

Step 4: Pull the poster board around the toaster so that it makes an oval. Tape the ends together, and make sure that it is loose enough to pull off the toaster.

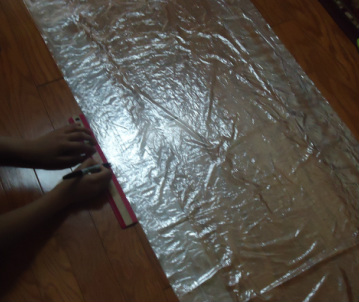
Step 5: Tape up any holes or rips in the dry cleaner bag, but try to use the smallest amount of tape possible; too much tape might weigh the balloon down.
Step 6: Draw the following table in your lab notebook :
Step 6: Draw the following table in your lab notebook :

Step 7: Measure the dry cleaning bag with the ruler and input the measurement on the blank line labeled "Full length". Then with the ruler and the marker, mark the bag with every 6 inches. Make sure they are visible.
Step 8: Empty the toaster of any crumbs, because they will burn during the experiment. Make sure you have a place with a high ceiling to conduct your experiment. If not, you can do it outside using an extension cord to plug in the toaster.
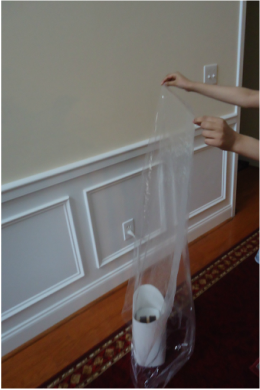
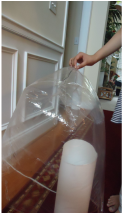
Step 9: Place the toaster on a dry, smooth surface. Pull out your stopwatch and be ready to start timing when you launch the balloon. Turn the toaster on and quickly slip the poster board ring over it. Pull the dry cleaning bag over the toaster and hold it up so it can fill up with air. Be careful NOT to melt the bag!
Step 8: Empty the toaster of any crumbs, because they will burn during the experiment. Make sure you have a place with a high ceiling to conduct your experiment. If not, you can do it outside using an extension cord to plug in the toaster.
Step 9: Place the toaster on a dry, smooth surface. Pull out your stopwatch and be ready to start timing when you launch the balloon. Turn the toaster on and quickly slip the poster board ring over it. Pull the dry cleaning bag over the toaster and hold it up so it can fill up with air. Be careful NOT to melt the bag!
|
|
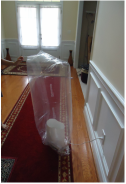
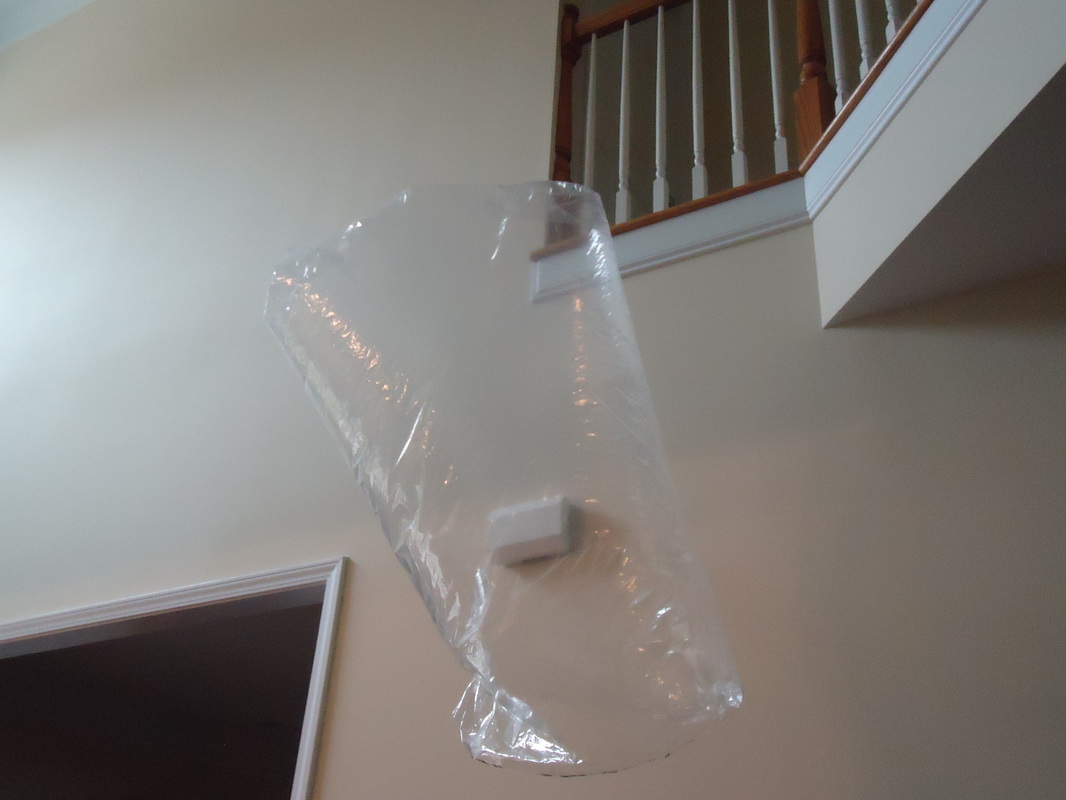
Step 10: Continue to hold up the bag until it is full of hot air. Then, release the bag and start the timer. It may be convenient to let someone else time the flight of the balloon.
Step 11: As you watch the balloon's flight, record any observations in your lab notebook. If the bag tips over in midair and lets out the hot air, you may also add sticky notes or tape to the bottom to stabilize it. But be careful to not add too much, since it will weigh the balloon down.
Step 12: Time the flight of the balloon until it touches the ground. Then input the time into the chart you drew in your notebook. Repeat steps 9-12 two more times, putting in the flight times on your chart.
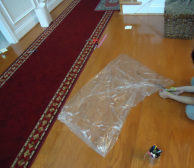
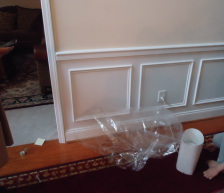
Step 13: After testing the balloon 3 times, lay it flat onto the ground or a smooth surface. Find the marker line you drew that is closest to the bottom of the balloon. Make sure it is exactly 6 inches from the edge. Then with the scissors, cut the dry cleaning bag along the line; try to cut the balloon so that it is straight at the bottom.
Step 14: Repeat steps 9-12 three times. Remember to put your observations and timings in your notebook!
Step 15: Keep testing and trimming the balloons until you have filled in all the spaces on your chart. You may draw a graph for the information by hand, or you may use a website.
Step 11: As you watch the balloon's flight, record any observations in your lab notebook. If the bag tips over in midair and lets out the hot air, you may also add sticky notes or tape to the bottom to stabilize it. But be careful to not add too much, since it will weigh the balloon down.
Step 12: Time the flight of the balloon until it touches the ground. Then input the time into the chart you drew in your notebook. Repeat steps 9-12 two more times, putting in the flight times on your chart.
Step 13: After testing the balloon 3 times, lay it flat onto the ground or a smooth surface. Find the marker line you drew that is closest to the bottom of the balloon. Make sure it is exactly 6 inches from the edge. Then with the scissors, cut the dry cleaning bag along the line; try to cut the balloon so that it is straight at the bottom.
Step 14: Repeat steps 9-12 three times. Remember to put your observations and timings in your notebook!
Step 15: Keep testing and trimming the balloons until you have filled in all the spaces on your chart. You may draw a graph for the information by hand, or you may use a website.
Full of Hot Air!
|
Cutting the Balloon
|

Flying High!
|
Filling up!
|
Up, Up, and Away!
|

Higher and Higher!
|
Coming in for a Landing!
|
